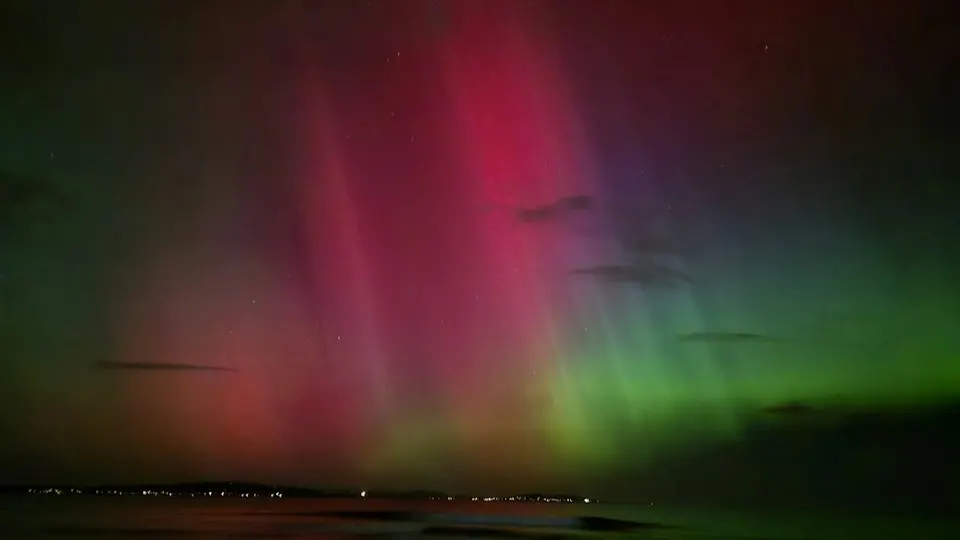
Put the phone on a tripod or prop it on something solid, switch on night mode or manual mode, set focus to infinity and pick an exposure of 3–10 seconds. For fast, rippling curtains, drop to 2–5 seconds. Fire the shot with a self-timer so you do not touch the screen.
The settings in short
- Keep it still. A tripod or a solid prop. A handheld night shot will blur.
- Main lens, 1x. It is the brightest. Digital zoom only makes the picture worse.
- Night mode or manual mode. The phone picks the time, or you set it yourself.
- Focus at infinity. By hand if the phone allows it. Otherwise tap a bright star or a distant light.
- Self-timer of 2–3 seconds. Or a Bluetooth remote.
- Test. Take one shot, zoom into the preview and adjust the time.
In Poland the aurora usually sits low over the northern horizon, so check that it is worth going out at all. We cover that at the end.
iPhone: night mode
Night mode works on iPhone 11 and later (Apple Support). It switches on by itself in low light and its icon turns yellow. A number next to the icon shows how many seconds the shot will take.
To lengthen the exposure:
- Tap the arrow above the viewfinder.
- Tap the night mode button below the viewfinder.
- Move the slider above the shutter button to Max. That lengthens the capture, and once you press the shutter the slider turns into a countdown.
Apple recommends a tripod or a solid surface for more stability and control of the exposure. It does not publish a maximum number of seconds, so we do not guess one. The phone shows the time on screen. Two things to remember:
- Live Photos and flash turn night mode off. Switch both off.
- You can stop a capture with the stop button below the slider when the aurora starts moving too fast.
Want full control of time and ISO? Use an app with a manual mode that saves RAW. The details depend on the model and the app, so start with night mode and a test shot.
Samsung Galaxy: Pro and Expert RAW
The default camera app has a Pro mode. Nothing to install. You set ISO, shutter time, white balance and focus. Samsung's guide does not publish ISO or shutter ranges, so check what your model offers.
For manual focus, tap the FOCUS icon and choose Manual. The slider to the right is for distant subjects. Slide it to the end and check sharpness on a bright star.
Expert RAW is a separate app from the Galaxy Store, available on Galaxy S20 and later. It saves RAW and gives full control of settings. It also has an astrophotography mode with Sky Guide, where you set the shooting time. It works only at 12 MP, and Samsung lists it for the S22 and S23 series. On other models check whether your version of the app has it. The mode is built for stars and needs a long exposure, which will blur a moving aurora, so plain Pro mode with a short exposure often wins.
Google Pixel: Night Sight and Astro
Night Sight is in the mode carousel, or it switches on by itself in the dark. Automatic Night Sight does not work with the flash on.
Astrophotography debuted on the Pixel 4 (Google, 2019). Google Help describes it for later Pixels too, and from the Pixel 4a (5G) on it works only at 1x zoom or more. On a tripod the phone switches to astro mode by itself once it is still. When the Pixel 4 launched, Google said the countdown on a tripod could take up to four minutes. Without a tripod, swipe the Night Sight slider to Astro and the phone starts a 5-second timer.
This matters for the aurora: astro mode is built for stars, which stand still. An aurora moves, so a long stack of frames can blur it. On a tripod the phone may switch to astro mode by itself, so take a test shot and judge the curtains. The Pixel 8 Pro also has Pro controls with manual focus, shutter time and ISO (Google). On other models check whether you have them.
- Focus. In camera settings, next to "Focus", choose Far. The phone then focuses on anything more than 4 metres away.
- 3-second self-timer. Google recommends it.
- Screen. Lower the brightness and turn on dark theme so your eyes adapt.
Google's tip to shoot stars at least 45–90 minutes after sunset does not apply to the aurora. An aurora can show up at any time after dark.
Other Android phones
Look for Pro or Manual mode (the name depends on the maker, often under "More"). Set ISO around 1600, exposure 3–10 seconds and manual focus at infinity. If there are no manual sliders, use night mode. ISO and time ranges differ between models, so do not hunt for numbers from someone else's guide. See what your own sliders offer.
Table: where to start
| Phone | Mode | ISO | Time | Focus | Notes |
|---|---|---|---|---|---|
| iPhone 11 and later | Night mode, Max slider | auto | auto, longer on a tripod | tap a star or a distant light | Turn off Live Photos and flash |
| Samsung Galaxy | Pro or Expert RAW | about 1600, usually up to 3200 | 3–10 s | Manual, slider to the right | Astro in Expert RAW is a long exposure |
| Google Pixel | Night Sight, optionally Astro | auto | auto (Astro takes longer) | Far | 3 s self-timer |
| Other Android | Pro / Manual or night mode | about 1600, usually up to 3200 | 3–10 s | manual at infinity | Ranges depend on the model |
The ISO and time values in the table are our starting points, not manufacturer data. Adjust them to the brightness of the aurora.
Framing and checking the shot
Point the phone north. The compass on your phone is enough. An aurora over Poland is low, so tilt the phone only slightly above the horizon and include a foreground: trees, a cliff, a dune. A picture of nothing but sky looks flat.
After the first shot, zoom into the preview and check three things: are the stars points or streaks, does the aurora have a shape or is it a smear, and is the sky blown out. Bad focus and shake are the most common reasons for a failed shot. If you see streaks, shorten the time or steady the tripod.
Common mistakes
- A torch or screen in the frame. White light ruins the picture and your night vision. Use a red light.
- Digital zoom. The picture turns grainy. Stay at 1x and crop later.
- A dirty lens. A cold phone from a pocket often has a smear or condensation on the glass. Wipe it with a soft cloth before you start.
- Touching the screen. Every tap during the exposure shakes the phone. Use the self-timer.
- Too long an exposure. Fast curtains blur after just a few seconds. A darker, sharp photo that you brighten later is better.
- Shooting through glass. It reflects the room.
- Flash. It will not light anything 100 km away, and on an iPhone it turns night mode off.
Cold and battery
In frost a phone battery drains faster, and long exposures and a bright screen speed that up. Keep the phone in a pocket against your body until the aurora appears. Lower the screen brightness, turn on low power mode and bring a power bank. A cold phone can also shut down while the gauge still shows charge.
When you move the phone into a warm car, condensation can form on the glass. Wait for it to clear before the next shot.
Editing without overdoing it
- White balance. If the sky is too yellow or too blue, set it around 3500–4000 K and adjust by eye.
- Noise. Reduce it gently in the app. Too much turns the aurora into a blob.
- Brightness and contrast. Lift the shadows, do not brighten everything.
- Saturation. Lightly. Too much gives unrealistic colours.
When to go out at all
The best settings will not help if there is no aurora or the sky is overcast. In Poland a photo usually works from Kp 5, and you can see the aurora with the naked eye from Kp 6 or 7. What that number means is explained in the guide to the Kp index.
The current score for your spot is in the aurora forecast. It weighs Kp, cloud and Moon. If the phone is not enough and you have a camera, see the guide on how to photograph the northern lights with a camera.
Do not miss the next window
The best windows last a few hours: after a storm, after rain, on a clear night with an active Sun. Sign up and we will email you when the index at your spots goes above 60.